


Chrome: Come installare certificati SSL auto-firmati

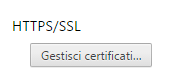
Apriamo le Impostazioni di Chrome, scendiamo verso il basso e clicchiamo su “Mostra impostazioni avanzate…“, quindi sotto “HTTPS/SSL” clicchiamo su”Gestisci certificati…“.
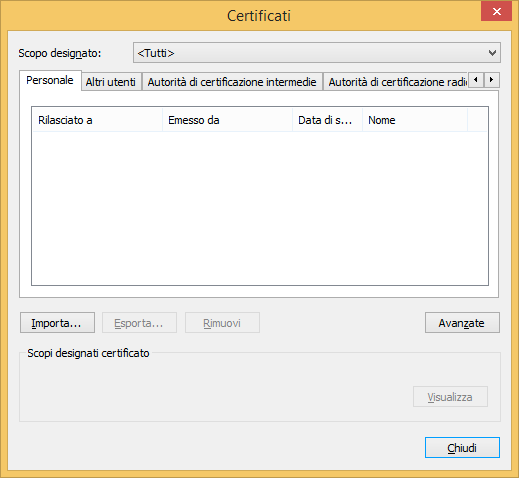
Clicchiamo “Importa…” e quindi “Avanti”.

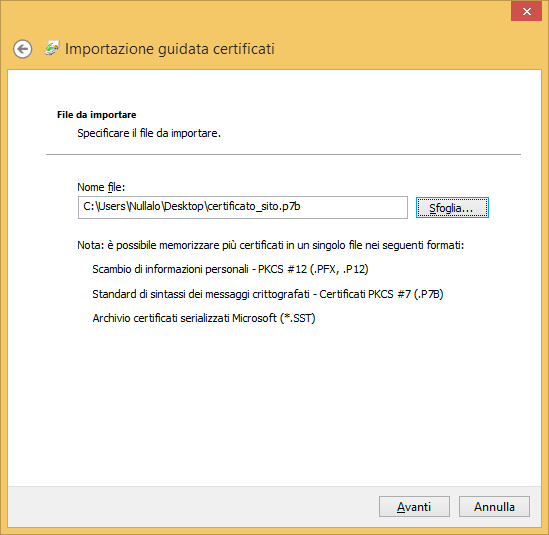
Clicchiamo “Sfoglia…” e, poiché non è l’opzione predefinita, nella finestra di apertura file assicuriamoci di avere “Certificati PKCS 7 (*.spc,*.p7b)” come filtro selezionato, altrimenti non vedremo il certificato precedentemente salvato.
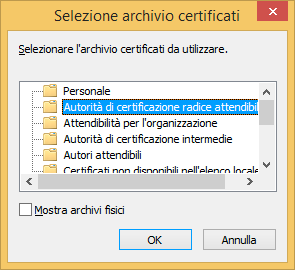
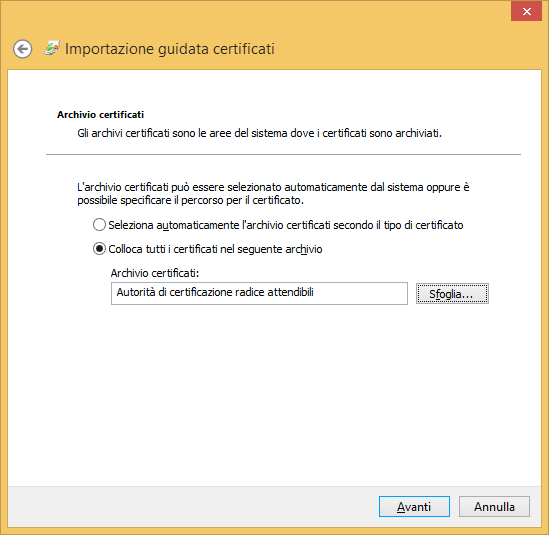
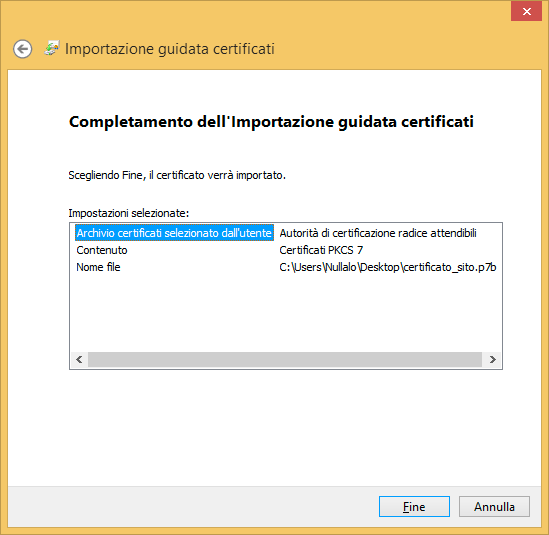
Clicchiamo “Avanti” e quindi “Sfoglia…”, e assicuriamoci di selezionare “Autorità di certificazione radice attendibili” come destinazione per il nostro certificato, quindi clicchiamo “OK” e poi “Avanti” e quindi “Fine”.
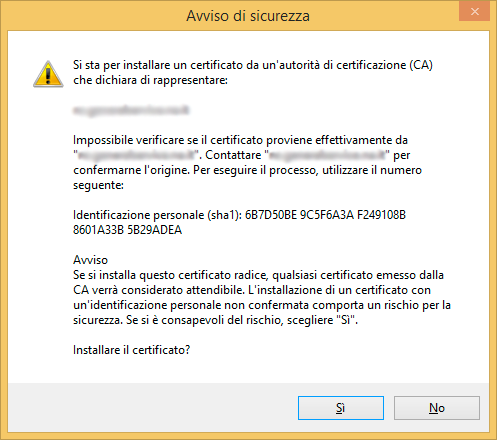
Ora semplicemente confermate l’installazione del certificato cliccando “Sì”.
Ora chiudete tutte le finestre, chiudete Chrome (importante), riavviatelo e provate a visitare il vostro sito… vedrete che ora è “Sicuro” (lucchetto verde) e senza avvisi!
La procedura sopra descritta è per Microsoft Windows, ma può essere facilmente replicata su altri sistemi operativi.


9 Commenti
Thank you so much for this – very helpful!!
“Click on “View certificate“, go to “Details” tab and click on “Copy to File…”.”
– No such option on macOS
Hi Nathan,
for MacOS, after clicking “View certificate”, select the certificate (last node of the tree located in the upper part of the window) and simply drag the large certificate icon (the one to the left of “Issued by” and “Expires” words) and drop it to your desktop or in any Finder window.
After that, you can import the saved certificate by double-clicking it.
didnt work
Did you read this article as well?
Okay this works.
I wonder, if this worked because I used chrome setting to install the server certificate?
When I tried installing server certificate using MMC certificate snap-in chrome ignored it and kept on displaying certificate invalid.
Now that your way worked I’ve deleted the server certificate using MMC certificate snap-in chrome still opens up the site in GREEN color.
Chrome is definately storing some information on its own storage just don’t know where that is…
Once the procedure in this article is followed, will the site security show as green for all visitors?
Hi Ben, since we’re talking about LOCAL development it will show as green just for you.
For a public website, you need a trusted authority certificate (e.g., you could use a Let’s Encrypt certificate), issued for your website’s domain (e.g. mywebsite.com).
Hello… I have the same problem. I followed your instructions and the procedure is done smoothly but sad to say it did not work. I still getting an error message and still in red lock on my https.